Wednesday, October 27, 2010

Monsters Workflow


Over half of the movie has been shot now and I have a load of great footage from a lot of different cameras. The a-cam was a Red MX but we also carefully shot on 5Ds, 7Ds and an EX1. And to add to that list, all the sound is dual system meaning it was recorded onto a separate recorder.

To deal with sound, Tim Dutton synced timecode as time of day with the Red and if another camera was running, shot a plate of the slate running for several seconds as well. At first I was looking at editing completely inside Premiere Pro CS5 to take advantage of the Mercury engine and its ability to work with almost anything in realtime inside a single timeline. The tests were great but the thing that still is a big bother with Premiere is its a pain to deal with dual system sound. Also, I might get to work with an editor and he's mainly a FCP guy. I batted around a number of ideas on getting a workflow that really protected the footage and transcoding was not really an option for me.

I've had Cineform for a long time and have had a love-hate relationship with it for years. I've used it on a number of other jobs but never really found a great way to take advantage of it. They've added major updates over the last year including a program called Firstlight. What Firstlight will give you is the ability to grade nondestructively a first look onto your footage. You can also load in .look files from Iradas Speedgrade. I'm trying out the trial for that right now. It's an amazing little program.

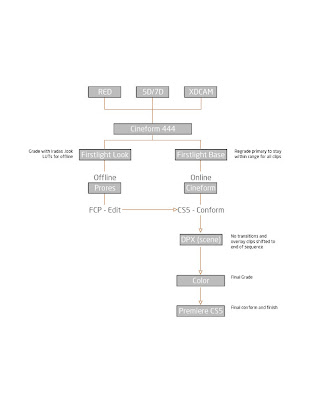
After testing tonight and seeing how Cineform is able to virtually rebuild the crappy h264 movs from the 5D and 7D and also closely protect the RAW data in RED files, I think I'm settled on a workflow. So here it is:

CONVERT
All footage will be converted into Cineform 444 and 422 DI files. From there I can build a Firstlight database and apply a LUT and basic grade to all the footage to give it an initial look. The active metadata inside each file applies the look in realtime. From there, I can ship the footage over onto the Mac and convert it into Prores files for editing. The look will bake into the files. Pretty cool to be able to edit with something like the final grade applied.

EDIT
In FCP, I can sync sound with Pluraleyes and replace the audio tracks quickly. Then the fun can start with actually making the movie. Once its done, I can ship out an XML file and copy the Prores files over to my PC to online in Premiere. From here I can reconform the footage back to the Cineform files. I can also link back up to the native Red files too if need be - and most likely will. Audio can ship out of FCP to go for finishing, scoring and sound effects.

CONFORM
In Premiere, I can now relink everything and also go into Firstlight to disable the LUT applied but I can also do a first pass on color to get everything looking even and flatten out any contrasting footage. Sequences can also have any overlays and transitions added here. I can then disable those transitions and leave just the straight cuts for color grading. I'll then render out separate sequences for each scene into DPX sequences.

GRADING
I'm a huge fan of Color. I think its a great app that has a lot of power in it that people miss. Testing some DPX sequences in there last night, I really found some new tricks I didn't realize existed when working with 5D/7D footage in particular. You actually gain a lot more finite control over the files and don't introduce loads of noise when pushing them around. Final grades will be rendered out in Prores 444 and final assembly can then trip back to FCP and/or Premiere for final finishing.


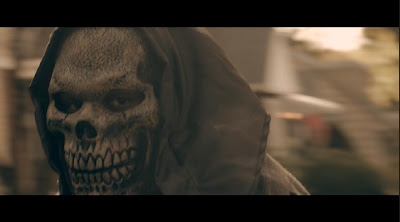
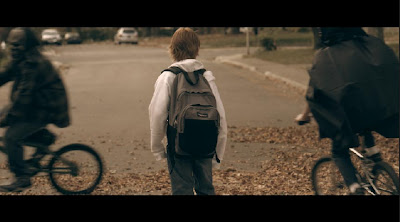
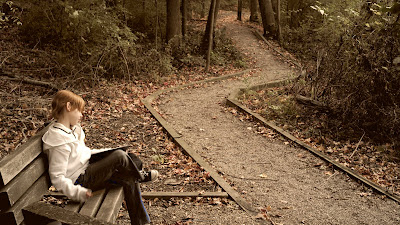
These stills here are directly out of Iradas Speedgrade. The looks can be exported and brought into Firstlight and applied in realtime. There's a little craziness happening in the jeans of the 2nd shot but in final color, something like that would be controlled.
Friday, October 22, 2010

Monsters: Day 1


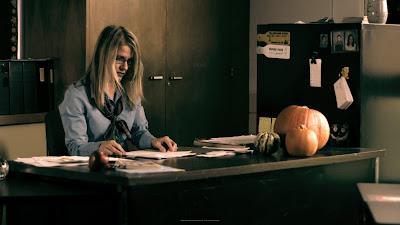
First day of shooting is done. It went fast. It's a low budget short so everyone is working for basically nothing. It was a scary day. There were shots we weren't able to get with how fast the sun disappeared. There were lots of planes, dogs and even an upset neighbor to stop shots. It's so nice working with a good crew who are there to support the story any way they can - down to just stopping traffic way away from the actual set. When I got home and was able to look at the footage, it blew me away. The kids were amazing and the performances were there. Nothing like starting with the toughest scene. Thank you everyone!

Sunday, September 26, 2010

Monsters Under the Bed Preproduction

It's been a long while since I've gotten to do a short of my own. I've had a script for a number of years that I just wasn't all to thrilled about but always loved the idea. Originally I planned to create CG creatures for in it and go nuts working with a little VFX piece of my own. Thankfully, time passed and it sat until a couple months ago the story came back to me and a new twist on it. I opened up the old script and then tossed it other than the name of the boy, the teacher and the basic ending. I'm very excited about it and so far, so is anyone else who is reading the latest draft. We're planning to shoot in late October. I'm looking forward to keeping you posted on the progress from here on out.

Saturday, August 28, 2010

Gear used on General Specific

I've been getting asked what gear we used to shoot the General Specific movie, our low-budget indie. The answer is, not a lot. Here's a quick rundown.

Cameras:

Sony EX1 was my main camera. Its little, has a great codec and is a workhorse. Seriously, its a tough camera that I can't say enough good things about. This thing took a bath in the Pacific one day and kept on going. I could rate it's ISO around 500 to 600 typically without worrying about noise. I'll still use this camera over the 5D on many occasions due to its easy codec and pro audio. Don't underestimate time savings in post.


Towards the end of production, the 7D came out and I added it to several scenes. Most notably the Russian scene. The 5D and 7D defintely have their own look, much like a film stock or the difference between a panny and sony. I also used it to shoot a VERY late-in-the-game scene with Wally and Clem in the car with a greenscreen backdrop. Considering we shot through the front and rear windshields outside in winter, I pulled keys that works well enough for the movie. You can pull a decent key off this camera but it definitely has its challenges.


Adapter:

On the front of the EX1, I used a Letus Extreme combined with a set of old Nikon primes I've collected over the years. I've been using the adapters since I built one of my own 5 years back and was the proud owner of the first Letus Flip (it kinda looked like a bomb).

Supporting this I had rails and support gear, shoulder mount and more from Zacuto and a baseplate and follow focus from Redrock Micro

The Zacuto rails and support I think you could hang a truck off the front of and not get vibration. Expensive but it'll last a very long time and its versatile enough that you can piece parts together in different ways to build around any kind of setup you might have.

The Redrock FF is the best quality vs. cost FF I've used out there. Very smooth and durable plus you get Redrock customer support which is some of the best in our industry.


Lights:

I used 2 Kino Flo Diva-Lite 400s heavily. Fast, bright, soft light and flexible. I have a set of both daylight and tungsten bulbs for both. A nice little touch sometimes is keeping one tungsten bulb in to just warm your key up a touch.

My other set of main lights was an ARRI kit with 2x650 1x300 and a 1K open face with softbox. I used that 1K a LOT as well. Great for popping up into a ceiling with a quarter CBT gel over it to lift your overall base light level.


Audio:
For audio, we used a pair of Audio Technica shotgun mics, a 4-channel mixer - which is essential. Get GOOD audio. A mixer will go miles in helping. You can cut off high end and low end noise at the source. You can get by with a mid-range mic but Jason managed to not need ADR on several scenes because of the quality of audio he got from being able to capture more accurately at the source.

We also used a H4N recorder for scenes with the 7D and synced with PluralEyes.


Other Items:

A basic set of sticks with a Manfrotto 503 head. It'll get you by for the price.

A skater dolly for a couple shots with wheels from Willy's Wheels.

A jib I wont name because it just didn't hold up well - expensive too - but had a LOT of camera shake

A light meter. This is invaluable on a small shoot for you. Finding contrast ratios between key and fill and backgrounds on your subjects is maybe more important when you have a limited number of lights.

A handful of used C-Stands from Matthews. Check your used photo shops. A lot of time, they get these in and Matthews gear holds up for YEARS.


A 5-1 reflector that I could quickly put up for bounce, shoot the 1K through for a big soft light or bounce as a hard fill with the sun. Also get yourself some black and white foamcore. It'll come in handy!


---
That's about it, in general, not a lot of gear. And overall, very pleased with the look of the production. Shoot smart and you can get a long way.

Friday, August 20, 2010

How to add chapters to itunes videos

I found it VERY difficult to a) ever find info on and b) how to actually add chapters to itunes movies. I haven't had to do this with anything in a while. But when it was time to get the General Specific ready this week for digital download, I had to head back into the nightmare of a process. It ended up not being so bad though, thanks to a brilliant and FREE little program I came across called Subler. So here you go. Simple steps on how to get it done.

1. Download Subler here. It was created by a brilliant guy I only know as Damiog.

2. Create a txt file with chapter listings like this:

00:00:00.000 Prologue
00:00:19.987 Opening
00:01:50.160 Episode Blablabla
00:21:54.530 Ending
00:23:24.453 Preview

3. Open subler and load up your m4v file you have output from Compressor or similar.

4. In subler, go to file > import > file and choose the text file. Boom! A new track just showed up with chapter listings. Checkmark it to activate it and save out your m4v again.

You can also edit ALL of the metadata for your file as well, drag and drop cover art, etc. Its a fantastic app that will give your files that same great look the big boys have in iTunes and on iPods.

Have fun!

Thursday, August 19, 2010

Format Considerations for Acquisition

Now that's a boring topic, huh? I thought it would be a good one to lead off with. What I want to take a minute and discuss is how I approach what camera and format to shoot on going into production and how that effects the end deliverable. There's a ton of this info out there already but I figure it's worth my chiming in. I'll keep it short and make it a little more like a checklist.

WHO'S THE CLIENT?
This is the first question that comes to mind to me. You need to understand what kind of expectations already exist for who you're working for. They may have an end deliverable. For instance, Sony Music requires a 1080p high quality (422 color or higher) deliverable. Other clients might not have a master deliverable requirement but they may have been working with productions for years. If this is that case, seeing productions suddenly scale back to tiny cameras and crews might be scary. A new client, in need of eduction can at times be one of the easiest to work with if you start out the conversation correctly and coach them through how you're giving them a high quality for very little footprint.

SHOT REQUIREMENTS
Are you shooting slow-mo? Is your deliverable that high quality 1080p master? Then don't shoot that slow-mo off a 7D, EX3 or something that shoots 720p. You need to to acquire higher res, most likely RED or now Alexa or if you can afford it, Phantom. do you need to hang off a crane? What weight requirements do you have? Do you have shots that require unique views (i.e. worms eye view from inside a hole) - might go 5D on a remote.

STYLE REQUIREMENTS
Style is similar to shots but for me includes the overall look of the production. Are you going for more of a reality feel? You can shoot with something like a HVX or EX1 with its native zoom and feel good about it. Shooting for a more filmic look? Shoot as high quality as you can and in that case, take into consideration what kind of glass you can work with. One example might be RED with a good set of Cookes is a whole different look than shooting 5D with a set of L-series glass on the front.

VFX
Are you doing a lot of VFX work in post? How about a couple DO NOTS... DO NOT shoot with a camera with bad rolling shutter and cause it to show up (5D and 7D users). Do not shoot with high contrast shots that blow out or underexpose. Shoot with a camera with more latitude (RED, Alexa). Shooting for motion tracking? Use a camera with a clean codec that doesn't block easily.

LIGHTING and LOCATION

Where do you have to shoot? What time of the day? If you're shooting at night and have a somewhat limited budget, pick a more sensitive camera like a 5D or 1D. Pick a RED MX over the original RED for night, you'll drop your lighting package considerably.

TALENT
Who are you shooting? If it's a celebrity, put together a good package. You''ll be spending on everything else around them anyway. Acquire in as high a quality as you can.

TIME
One of the most important. How much time do you have on the shoot? RED is not fast, XDCAM is very fast. Do you have a limited window? Maybe you need to shoot multiple cameras with a limited budget, picking something like XDCAMs will drop your need for needing ACs for each camera.

What kind of time do you have in post? It's amazing what you can really do with the 5D's codec and especially the XDCAM codex as limited of a color space they have. But with enough time and layering, you can get a really filmic look out of them with color correction. RED will get you there faster and better in post. Time and deliverable are important here. If you have a really tight deadline, shooting 5D rather than EX1 would be an issue as you have a ton of sync sound to process. What are your storage requirements? Think post through before you shoot. Its very important.

Those are a few of the questions I go through on each production and finding the proper balance. No single camera is going to be ideal in every circumstance. Think it through, weigh your budget requirements, get creative.

Thursday, August 12, 2010

The General Specific Movie is about to go full-go!


I'm excited! Finally, with a lot of work, we're about to launch the General Specific out to sail next week and see how she handles. It's going to be fun to see how well the media strategy I put together takes hold. We're doing a self-distribution strategy that is first going to start online and move into a guerrilla-style theatre release as well. I'll make sure I post a lot about it as I think it's going to be a good thing to document. Above that even, I'm going to make sure everyone gets to follow along with Jason (director) and Brian (lead) as well in webisodes and blog posts so you can get a real picture of what works and what doesn't.

The identity for the movie was worked out with me by my close friend Garrett Morlan. He did an amazing job! We landed on exactly what we were hoping for. A feel-good 80's touch. Very fun! Find him at www.garrettmorlan.com and hit him up for Art Direction and illustration.

Sunday, July 25, 2010

Elevate featured by Newtek at Siggraph


I'm excited to have the opportunity to have the Red video featured at Siggraph at the Lightwave3D booth. They also just posted it in their newsletter here.

I'm a big advocate of Lightwave as its been a very powerful program when needing to work small and fast. I do the vast majority of my own 3D work much of the time and Lightwave has always been able to let me do what I want. I think in part because it's so flexible and there is a lot of hidden power that most have no idea is there. Find out more about Lightwave at www.lightwave3d.com

Monday, July 19, 2010

Continued Thoughts on 3D Filmmaking

This weekend I saw Despicable Me with the kids and the theatre we went to was only showing it in 3D. I have to admit, I wasn't really all that interested in seeing this one in that format. It was an enjoyable movie but the extra ticket price it was not worth. Right now, I think we're starting to see a pushback on those prices everywhere. Many releases are subpar movies that are getting a pseudo-3D bath at the last moment before being released. It's like customizing a Yugo... in the end, its still a Yugo.

So with this 3D experience, I argued earlier that the rules of creating it need to change. It's NOT filmmaking as usual and I think many of the compositional rules need to change. I have a few more thoughts now as well. I argued that I think depth of field should be opened up and allow the viewer to select what they want to look at. Something I never expected myself to say is that I also now think that the framerates need to go much higher than 24FPS. Camera movement also needs to slow down. The handheld and shaky cinema verte effect is awful in these movies. Let's look at Despicable Me.

FRAME RATE
Large, sweeping, horizontal movements call out for a higher frame rate. The motion blur and sweepings pans causes a severe flicker that the eye doesn't seem to get used to. Movement towards and away from camera on the z-axis is where 3D excels right now but its gimmicky in most cases.

I'm wanting to test frame rates in the 60+fps range. I know people are screaming reading this that it's going to have a dreaded video look. No it won't I'll argue. 3D has the chance to be NEW! It's being pushed like crazy right now and it's about to blow up in the studios faces. It needs to go beyond just a stereo effect and quickly be looked at as a whole new format. 60fps will fill in those gaps that the human eye is missing and bring out more life in the shot I believe.

CAMERA MOVEMENT
I think composition and movement need to become more of what movies were in the 30's and 40's. Very controlled. Very basic. And also very dependent on the set design. Skaky camera movement goes against what we want to do with 3D, which is take in everything. Feel the depth and space of the shot. Become a part of it as an audience. Shaky and tight shots that don't allow us to "control" the space, feel forced and with the point made above about frame rate, are nothing but ugly annoyances telling us what to do. A sequence that worked fantastic in Despicable Me was towards the end where he has to walk a cable like a tightrope a mile up in the air. The camera played with the depth but also kept steady. It worked great. You could hear everyone in the place holding in their breath.

I know Stu just put out a great article on ProLost about techniques we appreciate overall as filmmakers. They are all correct too. These points I'm making fly in the face of many of those however. But again, this is an entirely different experience for the viewers. Now is the chance to make it real and truly different for audiences or see them push back and reject it. Better hurry and start experimenting quick.

Monday, July 12, 2010

cmiVFX.com training and Elevate

I never would have gotten the Red music video completed without the training picked up from cmiVFX. Their Fusion training was straight forward and I picked up what I needed to on a first viewing usually. I'm kinda slow too, so that's an accomplishment. Chris and Brian liked the video there enough they asked for a video interview. I was stoked to do that for them. You can find it on FXMogul and on their Vimeo page.

If you're doing any vfx, 3d or motion graphics work, this is seriously a good resource. Fusion, Cinema 4D, Houdini, Nuke, Blender, Flame... the list goes on and its all on the good stuff.

Tuesday, July 06, 2010

Red - Ordinary World is released


The Ordinary World released this week on iTunes and climbed into the top25 on the music video charts! It released on their site today with a Behind the Scenes video as well. Exciting to see what this video is doing. I'll continue to add links here as they come. Links below.

Redmusiconline.com
iTunes
Youtube VEVO


CREDITS:
Project: Ordinary World
Band: Red
Label: Sony PMG

Producer and Co-creator: John Zappin (AKA - John Reuben)
Director and Co-creator: Jeremy Hughes
DP: Al Laus
Gaffer: Howard Newstate
AC and Red Package: TJ Helmuth
Studio: NuMynd Studios - Nashville
VFX: Kelly "Kat" Meyers, Shawn Dorsey, Jeremy Hughes

Wednesday, June 23, 2010

The Mark Bradford Experience Shortlisted at Cannes Lions


Its exciting to see a project we had the pleasure of working on getting shortlisted for a Lion at Cannes. Best of luck Resource!

Here's the shortlist page

Wednesday, May 19, 2010

Fast Fusion


Why do I like Eyeon Fusion? Because its powerful and you can do all kinds of crazy things with it, yes. But its also wicked fast for pulling off shots that can be really challenging. The one here is one of 85 separate shots that needed keyed and comped for our film, The General Specific. When you have to shoot the scene in the winter with a bad greenscreen, having Fusion can be a lifesaver. After Effects and Keylight just could not give me a solid key no matter what I was trying. I was trying to keep it in there just for the ease of keeping the timeline together. Within 2 evenings however inside Fusion, I now have 85 shots keyed and comped with some pretty good results!

Tuesday, May 18, 2010

Red is coming


It's almost out and I can't wait! 3 months of grueling work on this project.

Project: Ordinary World
Band: Red
Label: Sony PMG

Producer and Co-creator: John Zappin (AKA - John Reuben)
Director and Co-creator: Jeremy Hughes
DP: Al Laus
Gaffer: Howard Newstate
AC and Red Package: TJ Helmuth
Studio: NuMynd Studios - Nashville
VFX: Kelly "Kat" Meyers, Shawn Dorsey, Jeremy Hughes

Monday, May 10, 2010

The Hurdles for 3D Filmmaking and the Possibilities of Overcoming Them

Let me start with I love 3D movies. I think its a great new (updated) medium and has a lot of potential. With that said, I think there is a serious flaw currently with the films that are being released. In order to make 3D work properly in movies, the number 1 piece of equipment that needs to change is the lenses movies are shot with. Let me explain my thinking.

When you look around the room, your eye is naturally able to focus on whatever it wants. If you pay attention to your peripheral vision, you will notice that everything you do not focus on goes blurry, out of focus. The farther off in the distance you look, the more out of focus the foreground goes.

Lenses work in the same manner. They have multiple layers of glass in them that are able to pull light through and project the image onto the imager. The simplest for being a pinhole camera. I don't want to turn this post into one long lesson on how lenses work but the focus and work very similar to the human eye. The "tighter" the lens, meaning the closer it focuses on a subject, the "shallower" the depth of field. This means that everything around the lens falls out of focus.

For decades, depth of field (DOF) has been used as a movie making tool to control where the director wanted the audience to focus their attention. For 3D, this needs to change. By using DOF as a tool in 3D movies, this is hurting the overall experience. The entire picture needs to be in focus.

Creating lenses that are able to focus infinitely while not needing loads and loads of additional lighting may be a big deal to overcome. Several alternatives may show themselves besides just lenses becoming faster such as imaging chip sensitivity but it needs to happen fast in order for 3D movies to be a lasting experience at the box office and not just a fad.

A lot of filmmakers may gasp at this idea as it means they may not be able to control where a viewer is looking all the time but it means solid composition, sets and use of color become more important - as it was hundreds of years ago with the master painters. They also need to depend on the audience to focus where they should and create that depth of field with their own eyes naturally. I think it opens up a whole new level of storytelling options. Think about the possibility of not just seeing a blurry vision of a killer sneaking up on the victim on the phone but actually allowing the audience the privilege of being able to focus back and forth between the two.

By opening up the frame, I think it can also open up the moviegoing experience. New theater experiences could be created by allowing viewers to move around more and by moving, seeing a change in parallax. This can only go as far as the cameras that film the scene but by throwing out DOF, that allows the cameras to shift apart wider and opening that new possibility up. Overcome the current challenges and you open up a real, new world of entertainment.

Friday, April 30, 2010

The General Specific Poster - for now


Here's the poster for the time being - feel free to spread it around!

Thursday, April 29, 2010

Pinocchio is on Fire

The Mark Bradford Experience site we were able to work on is live finally. Many thanks to Jill Brandt and Al Laus for their help in shooting this. Thanks to Resource for allowing us to be a part of it. Check it out! Duality (linked directly to) is my favorite part, I'm being partial here as we got to offer some input on how to push video in some different ways here for a unique experience.

http://www.pinocchioisonfire.org/#/experience/duality

Sunday, April 18, 2010

The General Specific Trailer

The General Specific Trailer from Jeremy Hughes on Vimeo.


The movie we've been working on since Fall is wrapping up and we should be ready to debut it locally on Memorial Day weekend. In terms of crew, this was an extremely light movie production and its exciting to see how well it's turning out.

Proper Audio Syncing in FCP

A couple months back I posted a little note about how to get nested audio into Soundtrack Pro from FCP and I have a better method that is surefire and doesn't take much longer. You can bring this into play at any point along the workflow but at the start is the best so you dont have to even think about how it might effect edits.

This all works whether you are syncing with Pluraleyes or doing it manually with a slate and is pretty easy.

1. I've found depending on your time and computer speed you can either a) batch convert into Prores ahead of time/on import or you can wait until you sync.

2. Sync your timelines up with Pluraleyes or by hand. One thing, if its interview footage, that can save you time and give you a little boost in logging better is to group takes into single timelines. Make sure your timelines all match with the correct codec you are using for your workflow, i.e. Prores HQ 1920x1080

3. Here's really the last step already, select all the timelines you have created and set them up with Media Manager to render out. I use referenced Quicktime clips so I dont need to rerender everything.

4. Reimport all the new clips you just created and you're ready for editing. If you decide to do this as a later step, for instance, if you are nesting sequences, you can drill down to the timeline you need to condense and media manage it into a referenced clip.

Monday, March 29, 2010

7D and Greenscreen


I've been finding some positive results with the 7D and keying. It seems the way it's codec will smooth together common areas of color or chroma can make for a pretty easy key to pull. Here's a quick shot though where the 7D can really burn you. Its not so much in the greenscreen where I'm having an issue, its in the blocking in the pants. That's an ugly mess. This would have been a problem whether on greenscreen or not and points to the DSLR's codec needing more detail rather than less. It looks like I ran the cartoon filter over it in After Effects. Something to consider when you're shooting.

Thursday, March 25, 2010

Red update

We're heading into the last leg for finishing up the Red video. There is still a lot to do but it's exciting to see the buzz the video is getting. It's been a blast turning this thing around in post, grueling but a blast. I've been tackling this project as a challenge with the tight deadline with the level of effects we're delivering. Two other guys have stepped on to help me out and have been huge in pushing this project along. Those would be Shawn Dorsey and Kelly (Kat) Myers. We've had a great, tight little crew that has helped out in so many ways along the way and when this is all over, I'll be sure to give props to each one.

But since I'm in post world right now, I just wanted to give a quick rundown of the tools that have been being put to work on this thing. Its a bit of throwing the kitchen sink at it since people aren't an option. I will say these tools work together so well though, I've had very few hangups so far and none of which has been major.

Editing - Premiere Pro with Cineform
Online/offline and assembly - After Effects
Lightwave 3D & messiahStudio
Eyeon Fusion
PFHoe for 3d tracking
ZBrush
3D Coat
E-On Vue
Skype has been great for collaboration as we're all over the place

Look forward to hopefully a lot of breakdowns and info on how this whole project flowed start to finish with a small budget and 7 weeks start to finish after we wrap up and deliver.

Monday, February 22, 2010

Shooting Red on Red


I'm pretty excited about this one. We're gearing up to shoot a new music vid for Red and their remake of Duran Duran's Ordinary World. This is a band I've followed for a long time and it's going to be a pretty aggressive shoot. It'll be about 100% greenscreen and I'm looking to turn out some pretty heavy effects. Stay tuned!

Friday, February 12, 2010

The Mark Bradford Experience


We recently had the pleasure of shooting the contemporary artist out of South Central LA, Mark Bradford with Resource. We shot footage that will be going onto a web site based around his upcoming exhibition that will be traveling but gets first showing at The Wexner Center at Ohio State University.

He's considered one of the top contemporary American artists today and did not disappoint. I typically meet most artists with a bit of skepticism with how much of today's art is more based around what kind of critical interest can be gained by using shock or mystery - sort of like film festivals - but that's another topic.

Mark Bradford is an absolutely stunning man, intelligent and someone whose work you need to gain his insight and eye first before being able to fully grasp. It was an energizing experience. I'm very glad to have been a part of it. Thanks to Jill Brandt and Al Laus for joining me in helping out!

Sunday, January 17, 2010

A Couple VFX Plates in Progress


A couple in progress shots from a new music video we're wrapping up currently.

Tuesday, January 05, 2010

How to get audio from nested FCP sequences to Soundtrack Pro

I was having a serious issue today trying to send sequences over to Soundtrack Pro for finishing. I would send them along and then sit there and stare blankly at Soundtrack wondering why the first track of audio didn't import. It turns out because Final Cut nested sequences don't like to include themselves inside the XML that is sent to Soundtrack Pro. Go figure. I searched everywhere and the only answer I could find was I would have to do a bunch of copy and pasting or cmd+dragging around of sequences to get them ready to ship. Then I had the good fortune of noticing a sequence I had already color corrected in Color didn't have this issue. Hmmm... a little testing and I found it seems to work every time (in this case 9 sequences).

This is good for any of you out there editing with a 7D or 5D and syncing audio to them with Pluraleyes.

1. Select your timeline in the browser
2. File > Send to > Color
3. Allow it to open up in Color
4. In Color: File > Send to > Final Cut Pro
5. Open the sequence that Color sent back over - will have (from Color) added to end of the seq name
6. Select that new sequence in the Browser
7. File > Send to > Soundtrack Pro Multiclip Sequence

Let me know how it works for you. It seems to work for me every time so far. It seems as if once the roundtrip is done from Color back to FCP that it either mixes down that audio or surfaces it somehow.